Although the high-strength Ceramic Shield 2 technology on the iPhone 17 Pro screen provides exceptional drop resistance, it can still fracture from unintentional drops or impacts. Damage to the screen can have an impact on the iPhone's appearance as well as touch capability, display quality, and even the proper operation of other internal components. For this reason, prompt repair of a damaged iPhone 17 Pro screen is essential. This Phonefix article explains how to fix a broken iPhone 17 Pro screen on your own, along with the equipment, procedures, and safety measures you'll need.

I. Preparation: Understanding the Essential Steps Before Repair
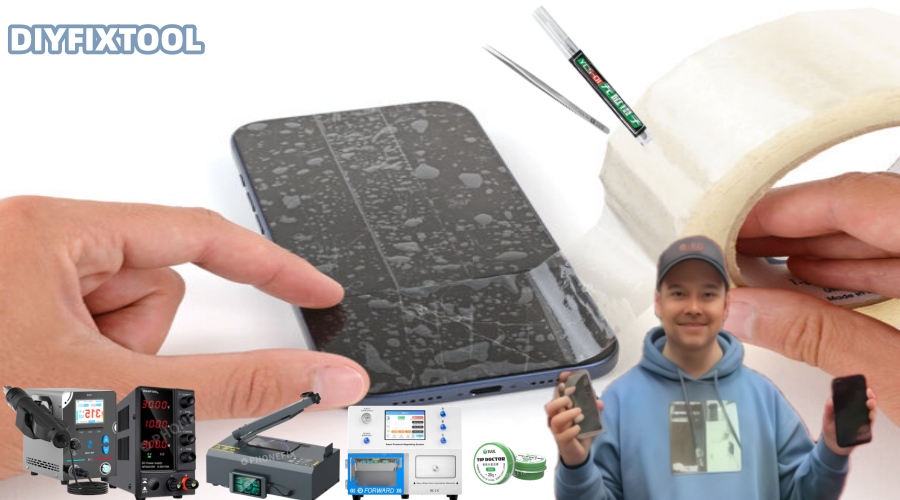
1. Required Tools and Materials
Before attempting to repair your iPhone 17 Pro screen, ensure you have the following tools and materials:
· iPhone professional screwdriver: Used to remove screws from the bottom of the iPhone and inside the screen.
· Plastic spudger and screen opening tool: Used to easily open the screen without damaging other components.
· Suction cup tool: Helps lift the screen and provides space to pry it open.
· Tweezers: Used to disassemble and reassemble delicate components.
· Heating source (such as a hair dryer or hot air gun): Used to heat the edges of the screen, softening the adhesive for easier removal.
· New screen and adhesive strip: Used to replace the damaged screen and ensure a secure installation.
· Anti-static working mat and container: Used to hold removed screws and small parts to prevent loss.
2. Ensure Device Safety
Before starting the repair, always ensure your iPhone is completely powered off. This prevents short circuits or other electrical malfunctions due to improper handling. Also, for safety, disconnect the device's power supply to ensure a safe repair process.
II. Screen Removal: How to Separate a Broken Screen
Step 1: Turn Off the Phone and Prepare the Working Area
First, ensure your iPhone 17 Pro is completely powered off. Then, apply a layer of tape to the screen surface to prevent debris from falling and to facilitate suction cup adhesion. Next, prepare a clean and tidy work area, preferably using a silicone pad to avoid damaging the internal electronic components of the iPhone.
Step 2: Remove the bottom screws
Use a Pentalobe screwdriver to unscrew the two screws located at the bottom of the iPhone. These screws are located on either side of the USB-C port and are the first step in removing the screen. Remember to store the screws in a safe place to avoid losing them.

Step 3: Heat the screen edge
Use a hairdryer or hot air gun to heat the edge of the screen for about 30 seconds. The purpose of heating is to soften the adhesive holding the screen in place, making it easier to separate the screen from the body. Be careful when heating; do not heat directly onto the center of the screen to avoid affecting the display.
Tip: Do not overheat; maintain a suitable temperature to avoid damaging other internal components.
Step 4: Use a suction cup tool to separate the screen
Attach the suction cup tool to the top of the screen and gently pull it up to create a small gap. Then, insert a plastic pry bar into the gap and slowly slide it along the edge of the screen to loosen the adhesive. Please note that the pry bar should be used gently to avoid damaging the screen or other internal components.
Note: If the screen is found to be tightly attached to the body, you can apply heat to more areas to help loosen the adhesive further.
III. Disconnecting Internal Components: Carefully Disassembling the Screen
Step 5: Open the iPhone and Disconnect Internal Connections
Once the adhesive around the screen edges has loosened, gently flip the screen open. Be extremely careful not to pull the screen directly. First, use a plastic pry bar to remove the metal cover covering the battery connector. Ensure that you do not damage other internal components during disassembly.
Key Steps:
· Always disconnect the iPhone battery connection cable before disconnecting any other cables. This is to prevent short circuits and ensure safety during the repair process.
· After disconnecting the battery connection, continue disconnecting the cables for components such as the display and front-facing sensor. These cables are very fragile and require gentle handling to ensure no damage to any components.
IV. Removing the Old Screen and Moving Components
Step 6: Removing the Old Screen
Once all cables are disconnected, the old screen can be completely removed. If your replacement screen doesn't come pre-installed with the headphone speaker, front-facing sensor, etc., you'll need to remove these components from the old screen and transfer them to the new one.
Removing Components: Using a pry bar and appropriate heating tools, gently pry up the headphone speaker and front-facing sensor. Handle with care to avoid damaging the Face ID sensor and camera module, as these components are crucial for the device's proper functioning.
V. Installing the New Screen: Reassembling and Testing
Step 7: Installing the New Screen
After placing the new iPhone screen in place, first connect all cables. Ensure each cable is securely connected, and the plugs must be fully inserted. After connecting, reinstall the metal protective cover to secure the cable connections.
Tip: Before proceeding to the next step, you can power on the new screen to test its functionality, checking touch response, display quality, and front-facing camera for proper operation.

Step 8: Reassembling the iPhone
After confirming that the new screen functions correctly, power off the phone and use new, high-quality adhesive tape to firmly bond the screen to the body. Ensure the tape is evenly distributed and there are no gaps at the joint between the screen and the body. Retighten the Pentalobe screws at the bottom to ensure the screen is completely sealed to the body and will not loosen.
VI. Calibrate the New Screen: Ensure Optimal Device Performance
Step 9: Calibrate the New Screen
Some screen replacements may require calibration within the system. Go to Settings > General > About > Parts & Service History to see if calibration is needed. When using an official Apple screen replacement, calibration may be required using Apple Repair Assistant to ensure optimal touch functionality and display.
VII. Frequently Asked Questions
1. Will DIY Repair Affect the Warranty?
Using non-original parts or attempting DIY repair may affect Apple's warranty. Apple recommends repairing through official channels or authorized service providers to ensure the device's warranty status.
2. Is it easy to damage the device during DIY repair?
DIY repair requires certain skills and patience. If you are unfamiliar with the disassembly process, you may accidentally damage other iPhone components under the screen, especially the front sensor, Face ID module, etc. Therefore, it is recommended to seek professional help if you lack experience.
3. How Long Does the Repair Take?
If you have some repair experience, the entire repair process will take approximately 1 to 2 hours. The key is to be careful and gentle during disassembly to avoid damaging internal components.
Although fixing an iPhone 17 Pro screen is not easy, you can do it yourself by following the preceding procedures provided you have some basic technical knowledge. Selecting an Apple Authorized Service Provider or a reputable third-party repair business is a wise choice if you are unsure of your skills or concerned about damaging your device. Making sure the restored phone is both aesthetically pleasing and operates normally is crucial, regardless of whether you go for expert or DIY repair. You have mastered the fundamental procedures and methods for fixing an iPhone 17 Pro screen thanks to this article. We hope you can successfully finish the fix and get the flawless screen back on your iPhone!


