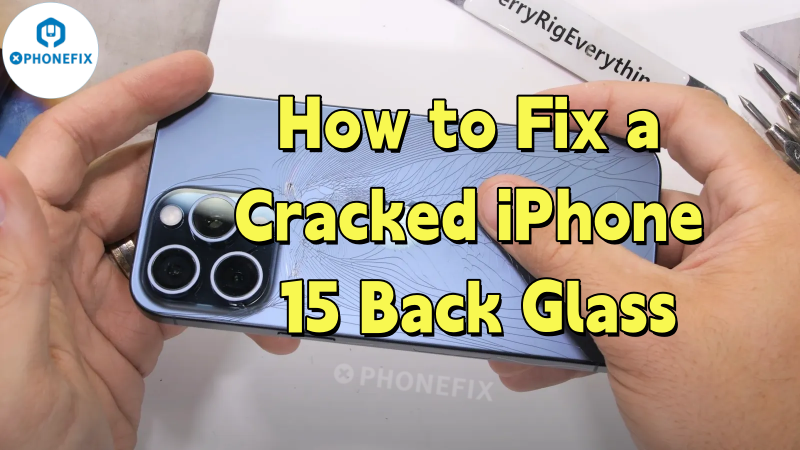
Have you ever accidentally dropped your iPhone 15 and found the back glass shattered into a spiderweb of shatters when you picked it up? Even if the screen functions perfectly, the waterproofing may be lost, wireless charging may be affected, and more importantly, those sharp glass shards could cut you at any time. However, the design of the iPhone 15 series offers new hope for back glass repairs. Before diving into repair options, let's first understand why the iPhone 15's back glass is now easier to repair.
Why is the iPhone 15's back glass easier to repair?
Unlike previous models, the iPhone 15 and iPhone 15 Plus feature removable back glass. This means replacing the iPhone Back Glass no longer requires disassembling the entire device and the complex laser removal and adhesive removal required. This not only significantly reduces the difficulty and cost of repairs, but also opens up the possibility for user-friendly repairs.
Tip: The back glass of high-end models like the iPhone 15 Pro and iPhone 15 Pro Max is still glued to the body, making repairs more complex and often requiring specialized tools and techniques.
Your Repair Options
If your iPhone 15's back glass is cracked, you can consider the following solutions:
1. Use a iPhone Protector Case
If your iPhone 15's back glass is cracked, covering it with a case may be your most immediate and quickest response. This is indeed a temporary fix, effectively preventing further breakage of the glass and limiting the crack's spread, preventing scratches. However, it's not a permanent solution. A simple case can't compensate for the loss of waterproofing caused by a cracked glass, exposing your device to water, dust, and dirt. Similarly, if you rely on wireless charging, you'll likely find that feature is no longer available. Therefore, a case can only buy you some time, but it won't permanently resolve the problem. 2. DIY Repair
If you're hands-on and want to try your hand at a repair, the iPhone 15's removable back glass offers an opportunity. Apple offers a DIY repair program, which allows you to obtain genuine back glass parts from official sources. Otherwise, you'll need a set of professional Phone Opening Tools. Once all preparations are complete, you can follow these steps:
Step 1: Preparing for Disassembly and Heating
Place the iPhone 15 on the repair tray and use a screwdriver to remove the screws on both sides of the USB-C port. Then, use a Heating Pad or hot air gun to evenly heat the edges of the back glass. This will soften the adhesive securing the back glass and prepare it for separation. Be extremely careful with the temperature and duration of the heating to avoid damaging internal components.
Step 2: Separating the Old Back Glass
After heating, gently lift the back cover off with a suction cup. Using a disassembly light will allow for clear viewing of the internal components, allowing you to avoid the critical wireless charging coil and camera assembly. Slowly pry open the gap and slide the plastic pick along the edges, ensuring only the adhesive is separated and not any retaining clips.
 Step 3: Cleaning Residue
After removing the old back glass, carefully clean any remaining adhesive from the frame using Phone Frame Glue Remover and a micro-tip. The disassembly light is useful here to ensure that all small glass fragments and adhesive are removed, especially around the camera housing and wireless charging coil.
Step 4: Installing the New Back Glass
Evenly apply the special adhesive to the new back glass. Use a demolition light to ensure there are no bubbles or gaps in the adhesive. Then, firmly align the new back glass against the phone, pressing first around the camera area and then gradually around the edges to ensure a perfect fit. Finally, apply gentle pressure with a pressure plate and clean up any excess adhesive.
Step 5: Curing and Final Inspection
Depending on the type of adhesive used, perform a curing process (e.g., using a UV Curing Lamp). After curing, carefully inspect the edges of the new back glass again with a demolition light to confirm there are no gaps and that the camera hole and wireless charging area are aligned. Once the back glass is securely in place, the repair is complete. Waring:DIY repairs carry risks. Any improper handling can damage internal components and even cause new problems. Therefore, before attempting any repairs, be sure to carefully read the official repair manual and ensure you are competent.
3. Professional Phone Repair
If you're unsure of your own skills or have a more complex iPhone 15 Pro/Pro Max, seeking professional repair is a wise and reliable option. Professional repair technicians can complete the entire repair process safely and efficiently. Not only can they replace your cracked rear glass, but they'll also conduct a thorough inspection of your device to ensure there's no internal damage from the impact.
Conclusion
Whether you choose to do it yourself or seek professional help, the iPhone 15's removable rear glass makes repairs easier than ever. With the above explanation, I believe you've explored all the options and found the method that works best for you. If you'd like to attempt a repair yourself but struggle to find the right tools, Phonefix offers a comprehensive suite of professional, high-quality iPhone repair tools to make DIY repairs even more convenient.


