This guide shows you how to tackle one of the most common iPhone issues—rapid battery drain and unexpected shutdowns, especially in cold weather. These are classic signs of an aging battery. While repair shops often charge high fees and keep you waiting, you can actually refresh your battery at home with the right tools and clear, step-by-step guidance, like the solutions offered by Phonefix. Not only does replacing the battery yourself save money, but it also gives you a rewarding hands-on understanding of your device. By preparing a high-quality Mobile repair kit, even a complete beginner can safely and smoothly restore their phone to peak performance.
I. Preparation: The Essential Repair Tool Checklist
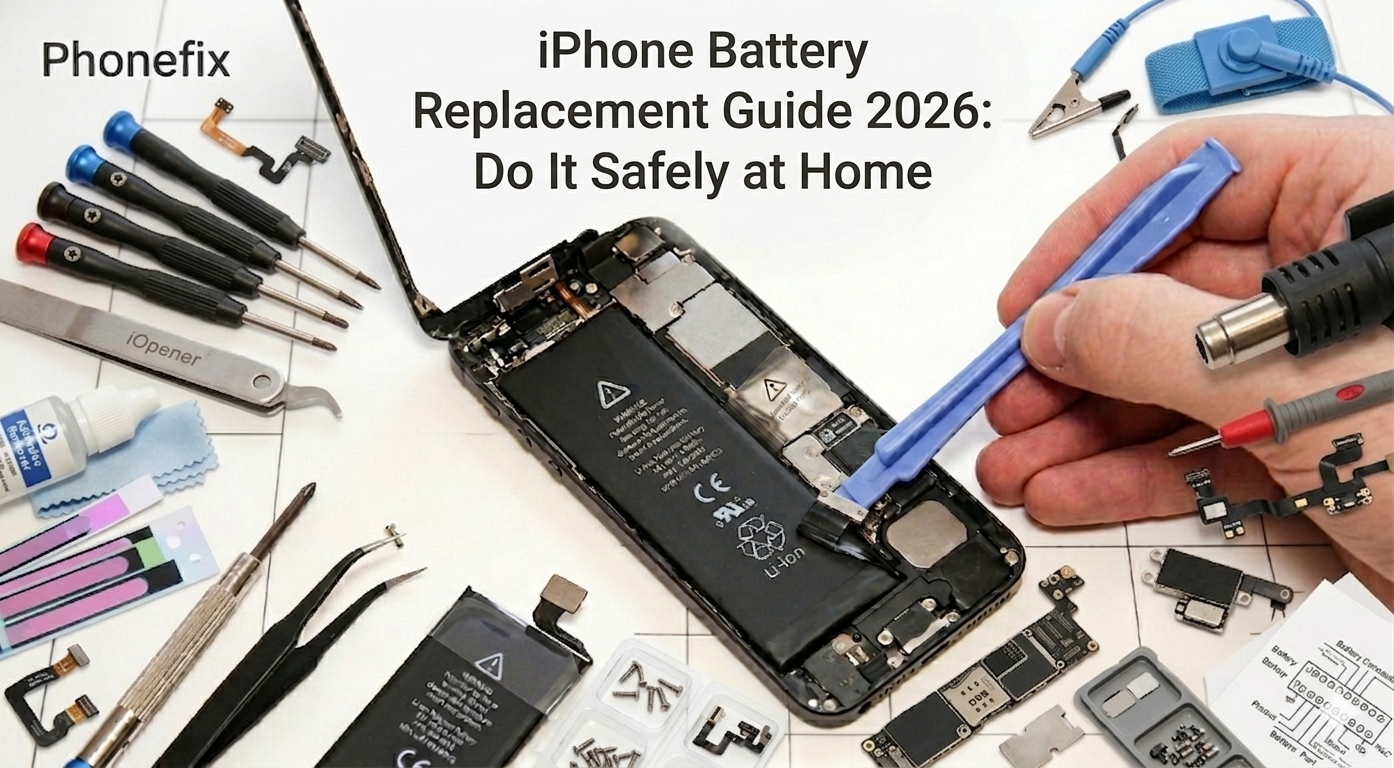
Before opening your device, having the right tools ready is the key to success. Using specialized tools greatly reduces the risk of damaging the delicate internal structure of the iPhone.
Core Tools for iPhone Battery Replacement:
Pentalobe Screwdriver: Used to remove the two external screws next to the charging port.
Phillips and Tri-point Screwdrivers: To handle the various internal screws securing the metal plates.
Plastic Spudgers and Opening Picks: To safely separate the screen from the body without scratching it.
Suction Cup: To help lift the screen assembly and create a gap for disassembly.
Anti-static Tweezers: To precisely pick up tiny screws and cable connectors.
Hot air Gun: To soften the waterproof adhesive around the edges, making the screen easier to open.
Professional iPhone repair kit: An all-in-one solution containing every necessary component.

II. Step-by-Step: How to Replace Your Battery
Step 1: Preparation
Check the "Battery Health" in your system settings. If the maximum capacity is below 80%, a replacement is recommended. Before starting, power off your phone and ensure the battery charge is below 25% to prevent the risk of fire if the battery is accidentally punctured.
Step 2: Disassembly and Separation
Carefully use the suction cup and opening picks to create a gap. If you feel strong resistance, use a hot air gun to apply even heat along the edges. Remove the internal shielding screws and gently disconnect the battery cable. Remember: When removing the old battery, pull the adhesive strips flat and avoid bending or piercing the battery with metal objects.
Step 3: Installation and Reassembly
Place the new battery in its designated slot and snap the connector into place. Before sealing the device, perform a quick power-on test. Finally, use an iPhone battery Replacement tool to confirm the battery readings are accurate and the system recognizes its health correctly.

III. Quick Reference Guide:
1. Confirm battery status and power off.
2. Discharge battery to below 25%.
3. Heat the edges and use suction/picks to open the case.
4. Remove internal screws and disconnect the old battery.
5. Install the new battery and reconnect the cables.
6. Seal the device and perform a final check with a diagnostic tool.
IV. Critical Safety Rules to Remember
Patience is vital when handling lithium-ion batteries. Never use metal tools to pry the battery directly, and keep your workspace clean and well-lit.
DIY Safety Checklist:
· Ensure the starting charge is below 25%.
· Do not crush, fold, or puncture the battery pack.
· Use plastic anti-static tools throughout the process.
· Organize every tiny screw removed (do not mix up their positions).
· Work slowly and never force any component.
Replacing an iPhone battery at home is a cost-effective and rewarding challenge. Get high-quality iPhone batteries and tool kits for replacing phone batteries from PHONEFIX, you can achieve professional-level results. With a final diagnostic test to ensure all parameters are normal, your iPhone will be ready to accompany you through your daily life once again.


