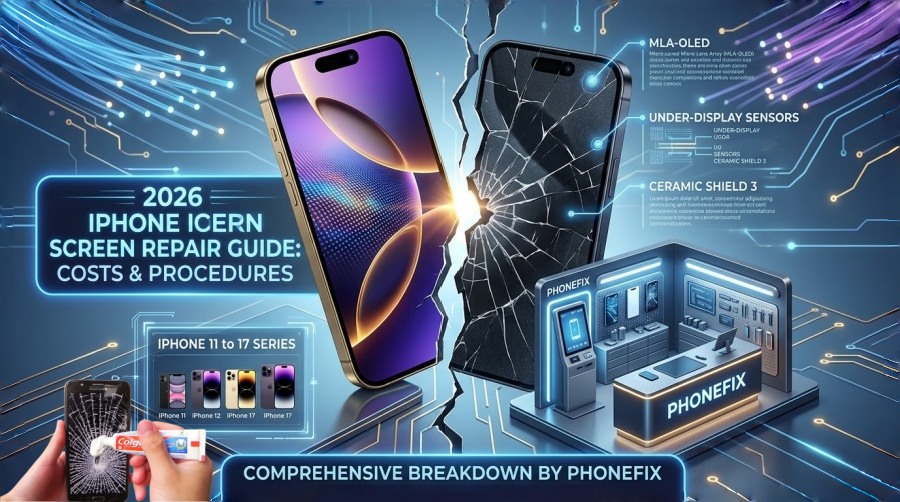
In 2026, the iPhone remains a masterpiece of engineering, but its screen—now featuring advanced MLA-OLED and integrated under-display sensors—remains its most vulnerable component. If you’ve suffered a cracked screen, Phonefix provides a comprehensive breakdown of replacement costs and technical procedures for every model from the iPhone 11 to the latest iPhone 17 series.
I. iPhone Screen Replacement Cost Table (2026 Estimates)
Repair costs in 2026 are divided into three tiers: Apple Official (Out-of-Warranty), AppleCare+ (Fixed Rate), and High-Quality Third-Party alternatives.
| iPhone Model | Apple Official (Out-of-Warranty) | AppleCare+ (Deductible) | 3rd Party High-Quality |
| iPhone 17 Pro Max | $379+ | $29 | $240 - $280 |
| iPhone 17 Pro / 17 / 17 Air | $329 - $349 | $29 | $190 - $230 |
| iPhone 16 Pro Max | $379 | $29 | $200 - $250 |
| iPhone 16 Pro / 16 Plus | $329 | $29 | $180 - $220 |
| iPhone 16 / 16e | $279 | $29 | $150 - $190 |
| iPhone 15 Pro Max / 14 Pro Max | $349 | $29 | $160 - $200 |
| iPhone 15 / 14 Plus / 13 Pro Max | $299 | $29 | $140 - $180 |
| iPhone 15 / 14 / 13 / 13 Pro | $279 | $29 | $120 - $160 |
| iPhone 12 / 12 Pro | $249 | $29 | $100 - $140 |
| iPhone 11 / 11 Pro Max / 12 mini | $199 | $29 | $80 - $120 |
| iPhone SE (2nd/3rd Gen) | $129 | $29 |
$60 - $90 |
Note: Third-party prices vary based on screen type (Flexible OLED vs. Rigid OLED). For Pro models with ProMotion (120Hz), third-party screens may occasionally lack the same fluid refresh rate unless high-end components are used.
II. Professional Repair Steps: How to Replace an iPhone Screen
Repairing a 2026-era iPhone requires precision. Apple has increased the integration of the Dynamic Island and Face ID sensors, making the "Display Assembly" more complex than ever.
1. The Professional Toolkit
· Pentalobe P2 Screwdriver: To remove the two security screws at the bottom.
· Precision Hot Air Gun/Heat Mat: To soften the industrial-grade waterproof adhesive.
· iSclack or Heavy-Duty Suction Cup: For controlled opening.
· Ultra-Thin Opening Picks: To slice through the perimeter seal.
· Y000 (Tri-point) & Phillips #000 Screwdrivers: For internal bracket screws.
· Static-Safe Spudger: To safely disconnect delicate ribbon cables.
· True Tone Programmer (e.g., JCID V1S Pro): To transfer serial data from the old screen to the new one.

2. Detailed Step-by-Step Procedure
Step 1: Softening the Adhesive
· Heat Application: Use a heat gun set to 80°C around the edges of the iPhone for 3 minutes. This is crucial for iPhone 16/17 models, which feature enhanced IP68 water resistance with stronger bonding.
· The Initial Gap: Place the suction cup near the charging port and pull upward steadily. Insert a thin plastic pick as soon as a tiny gap appears.
Step 2: Slicing and Opening
· Perimeter Cut: Slide the pick around the edges. Warning: On iPhone 15-17 models, do not insert the pick deeper than 3mm on the side where the ribbon cables are located (usually the left side when facing the screen) to avoid tearing the digitizer cable.
· The "Book" Opening: Swing the display open from the left to the right. Do not fully remove it yet.
Step 3: Critical Power Disconnection
· Bracket Removal: Use the Y000 screwdriver to remove the metal shield covering the logic board connectors.
· Battery First: Disconnect the battery press-fit connector immediately. Never disconnect the screen while the battery is live, as it can blow the backlight fuse on the motherboard.
Step 4: Component Transfer & True Tone Calibration
· Sensor Array: Carefully unglue the ambient light sensor and microphone assembly from the top of the old screen and move them to the new one.
· Data Migration: Connect both the old and new screens to a programmer. Copy the unique "True Tone" data. Without this step, your iPhone will lose its auto-color adjustment feature.
Step 5: Resealing and Testing
· New Waterproof Seal: Scrape off the old adhesive residue using isopropyl alcohol and apply a pre-cut waterproof gasket to the frame.
· Dry Fit: Connect the cables, snap the battery back in, and power on. Test touch sensitivity, Face ID, and brightness.
· Final Closure: Once verified, screw back all internal brackets, fold the screen down (top first), and replace the two Pentalobe screws at the bottom.

III. Why are 2026 Repairs More Expensive?
1. Ceramic Shield 3: The latest glass is tougher to break but significantly more expensive to manufacture.
2. Part Pairing: Apple’s "Software Lock" requires official calibration. If you use a non-genuine part without a programmer, you may see an "Unknown Part" warning in Settings.
3. ProMotion & MLA Technology: The Micro-Lens Array (MLA) used in the iPhone 17 series significantly boosts brightness but requires precise manufacturing, driving up the cost of replacement panels.
IV. Final Recommendations
· For New Models (iPhone 16/17): If you don't have AppleCare+, the $300+ price tag is steep. We highly recommend using a screen protector and a high-impact case.
· The AppleCare+ Strategy: It remains the best value. For a small monthly fee, a $379 repair turns into a $29 flat fee.
· DIY Enthusiasts: Only attempt a DIY repair on 2025/2026 models if you have a True Tone Programmer, or you will lose significant functionality.
Welcome to China Phonefix, your premier destination for professional iPhone screen repair tools and 100% genuine iPhone parts. From high-precision JCID programmers for True Tone migration to specialized heating stations and original-spec waterproof adhesives, we provide everything you need to ensure a flawless repair. Don't settle for subpar quality when it comes to your iPhone 17 or any classic model—equip yourself with the industry's best at China Phonefix and bring your screen back to life with confidence!


