In a previous article, we discussed a simple method for repairing Face ID using the AY A108 programmer and AY dot matrix flex cable, which involved no soldering or jump wiring. However, this method required downloading software onto a computer and connecting the programmer to the computer to restore the data.
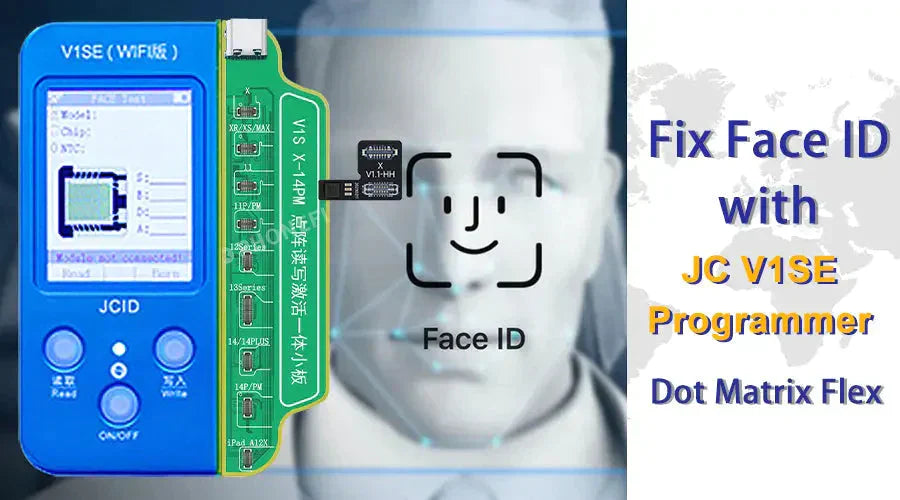
Fortunately, we now have an even easier way to repair Face ID without the need for any software downloads. In this article, we will provide step-by-step instructions on how to use the JC V1SE Programmer to fix Face ID.
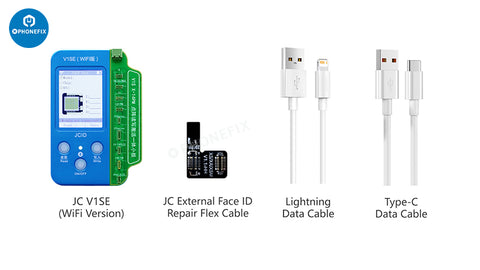
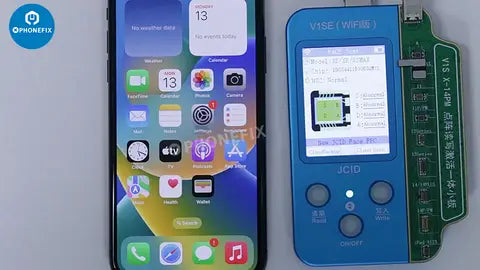
Tools Required:
- JC V1SE (WiFi version)
- JC External Face ID Repair Flex Cable
- Lightning Data Cable
- Type-C Data Cable
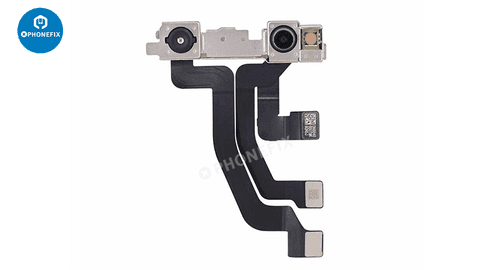
Step 1: Remove the Front Camera Assembly
Begin by removing the screen, battery, and front camera assembly from the iPhone XS with disabled Face ID. The settings page should display the prompt "A problem was detected with the TrueDepth camera. Face ID has been disabled."
Step 2: Install the JC V1SE Programmer
Install the JC V1SE Programmer and JC Dot Matrix Extension Test Board. Connect the type-c port of the test board to power supply through the type-c data cable (fast charging is required). Connect the JC V1SE programmer USB port to the lightning data cable for connecting the phone.
Step 3: Backup the Face ID Data of the Dot Matrix Flex Cable
Reinstall the battery and screen, and turn on the phone. Connect the phone to the V1SE programmer. Connect the dot matrix flex cable to the programmer to detect any faults.
If it shows "Abnormal Fuses, Please replace the IC!", press the "Write" button to switch to the activation interface. Press the "Write" button again to activate. After activation is complete, press the "Read" button to exit.

Press the "ON/OFF" button to switch to the cloud backup interface. Then press the "Read" button to back up Face ID data. Backup successful.
Step 4: Write the Face ID Data into the JC Dot Matrix Flex Cable
Take out the external face ID repair flex cable. Remove the original dot matrix flex cable and install the external face ID repair flex cable on the V1SE test board. Press the "Write" button first.
When it shows "query successful," press the "ON/OFF" button again to write the cloud backup data into the external face ID repair flex cable.
When it shows "Burning will overwrite the original data Do you want to continue burn?," press "Read" to ensure. Press "ON/OFF" to ensure again.
Step 5: Install the Tag on Face ID Repair Flex Cable and Test
Take out the external face ID repair flex cable and install it on the dot matrix flex cable. Turn off the phone again, remove the screen and battery, and re-install the iPhone front camera assembly back into the phone.
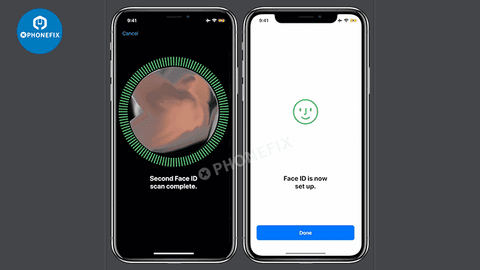
Reinstall the battery and screen. Turn on the phone to test the Face ID function, which should now be working normally.
Watch the video:


2 comments
uvesh patel
my v1se not support iphone 13 or later model
so how can solve this problem?
David Pogačar
Hi i buy v1se programator now i have error when i try to go fix face id it says you cant bind more than 5times what is this?help needed