
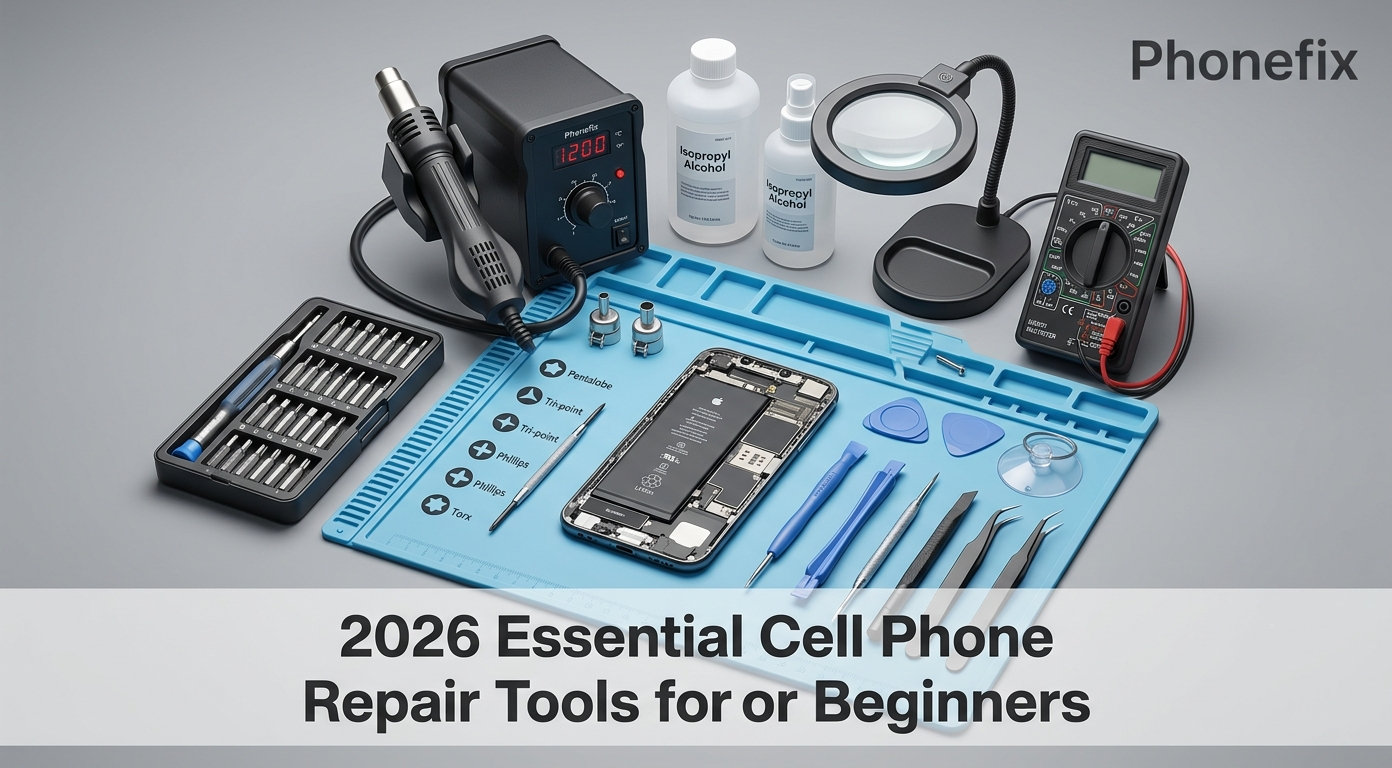
Smartphone repair in 2026 demands more than steady hands and patience. Modern devices are built with industrial-strength adhesives, miniature screws of many types, and tightly packed internal components. A common household screwdriver or a kitchen knife will not work—they cause damage and void warranties. For beginners entering this field, having a correct, well-chosen cell phone repair tool is important. This guide outlines the basic tools, precision instruments, and safe usage practices and explains how to use each one properly.

I. Basic Phone Repair Tools
This category covers the tools needed for every repair session, from opening the device to closing it back up. Without these, even a simple screen replacement becomes impossible.
Precision Screwdriver Set
· This is the workhorse of any repair bench. Phones use multiple screw heads—Pentalobe (P2) for iPhones, Tri-point (Y000) for internal shields, Phillips (PH000, PH00) for Android brackets, and Torx (T3–T5) for Pixel and Galaxy models.
· Using the wrong bit strips the screw instantly. A good set uses S2 tool steel bits with a hardness of 58–62 HRC.
· Match the bit exactly, insert it fully, apply firm downward pressure, and turn.
· If the bit slips, stop immediately—the wrong size is being used.
Opening Tools
· Separating glued screens from frames requires a smartphone opening tool kit that includes thin plastic picks, nylon spudgers, and opening cards.
· Metal tools scratch internal parts, so plastic is preferred. Insert a pick into the gap created by suction or heat, slide it slowly around the perimeter to cut the adhesive, and use a spudger to gently lift ribbon cables or disconnect battery connectors.
· Never pull on the cables themselves.
Suction Cup or Screen Opener
· A heavy-duty suction cup with a ring or handle lifts the screen evenly.
· For frequent repairs, a dual-suction plier or a screw-controlled opener applies even pressure and lowers the risk of cracking fragile OLED panels.
· Place the cup near the bottom edge, pull up steadily, insert a pick once a gap appears, and work around the edges gradually.
Cleaning Supplies
· Clean surfaces are critical for proper resealing.
· Isopropyl alcohol (90–99%) dissolves adhesive residue and cleans contacts.
· Lint-free wipes and microfiber cloths prevent stray fibres on screens.
· A soft ESD brush removes dust from ports and connectors.
· Dampen a cloth with alcohol (do not soak it), wipe away old residue, and clean the screen before final assembly to avoid trapped dust.
Adhesives and Seals
· After opening, the phone must be resealed to restore water resistance.
· Pre-cut adhesive strips specific to the phone model are best.
· Remove all old adhesive with alcohol, apply the new strip carefully around the frame, press the screen in place, and use clamps or rubber bands to hold it for 1–2 hours while the adhesive cures.
Screw Organizer
· Phone screws come in different lengths; mixing them damages internal components during reassembly.
· A magnetic project mat or a parts tray with labeled sections keeps screws orderly.
· Place screws on the mat in the same layout as they appear on the phone—this simple habit prevents costly mistakes.
Heat Source
· Adhesives soften with heat. A controlled Heat Mat is the safest and most consistent option; a hot air gun works but requires careful handling because OLED screens are easily damaged by overheating.
· Warm the edges for 1–2 minutes until the adhesive softens (not melts).
· Move the heat source constantly and test with a pick—if it does not slide in easily, add more heat.
Tweezers
· Tweezers are used throughout the entire repair process, from the first screw removal to the final cable connection.
· Fine-point tweezers—preferably ESD-safe ceramic or insulated steel—are the standard choice. Angled tips help reach tight spots.
· Use tweezers for placing screws, positioning small brackets, and gently manoeuvring ribbon cables.
· Do not use them for prying or pulling with force—that is a spudger's job.
II. Precision Repairs Tools
Once the phone is open, finer work begins. These tools help with delicate internal operations, diagnostics, and micro-soldering if needed.
ESD Protection
· Static electricity is invisible but can destroy a logic board with a single discharge. An ESD-safe mat with a grounding cord and an anti-static wrist strap are essential.
· Place the mat on the work surface, connect the grounding wire, wear the wrist strap and attach its clip to the mat or a grounded point.
· Work on the mat throughout the whole repair—this simple setup protects devices from static damage.
Magnifying Lamp or Digital Microscope
· Inspecting small components and detecting cracks, bent pins, or corrosion requires magnification. A magnifying lamp with a built-in light or a digital microscope (20–100×) is helpful for advanced repairs.
· These tools reveal damage invisible to the naked eye, such as broken traces or burnt contacts, and make tricky tasks like jumper-wire repairs much easier.
Digital Multimeter
· A multimeter is the starting point for circuit diagnosis. When a phone fails to power on or shows a short circuit, set the multimeter to diode or resistance mode.
· Ground the black probe and use the red probe to measure across key power capacitors. A reading near zero indicates a short in that branch.
· This value-checking method quickly locates fault points on the motherboard. For beginners, a basic autoranging multimeter is sufficient.

Regulated DC Power Supply
· For more advanced troubleshooting, a DC Power Supply provides simulated battery power and shows current draw during startup.
· By setting the voltage to the phone's nominal 3.8–4.2 V and watching the ammeter, one can judge whether the CPU, memory, or display circuit is faulty.
Digital Oscilloscope
· For diagnosing intermittent faults, missing clock signals, or abnormal power delivery, a digital oscilloscope is the tool of choice.
· Unlike a multimeter, which shows only static voltage values, an oscilloscope displays voltage changes over time as visible waveforms.
· This makes it invaluable for testing signals such as the 32.768 kHz clock crystal (critical for CPU startup), PWM control signals from charging ICs, and MIPI display interface signals.
· A 50–100 MHz dual-channel handheld oscilloscope is sufficient for most phone repair work. For beginners, this tool is optional—master the multimeter first, then add an oscilloscope as diagnostic capabilities improve.
III. Tips for Using Phone Repair Tools Safely and Effectively
Owning the right tools is only half the battle. Using them correctly prevents damage and improves repair quality. Follow these practical guidelines.
1. Always power off the phone and disconnect the battery first.
Before any internal work, turn off the device and disconnect the battery connector using a spudger. This prevents short circuits and protects both the phone and the repairer.
2. Organise screws by location from the start.
Use the screw organizer and place each screw exactly where it came from. Taking a photo before removal also helps with reassembly. Mixing screws can puncture the screen or damage threads.
3. Apply heat gradually and evenly.
Excessive heat burns the display or softens internal components. Warm the edges slowly and test with a pick. If resistance is still high, apply more heat in short bursts rather than one long blast.
4. Use the right tool for each task.
Stripped screws, cracked screens, and damaged cables often result from using a screwdriver as a pry bar or tweezers as a cutter. Respect each tool's intended purpose—precision screwdrivers turn screws, spudgers pry, picks slice adhesive.
5. Keep the work area and components clean.
Old adhesive residue prevents new seals from bonding. Use alcohol and a lint-free cloth to thoroughly clean the frame and the screen's edge. Also, after any soldering (if performed), clean flux residues with alcohol to prevent corrosion over time.
6. Work on an ESD-safe surface at all times.
Even without feeling a spark, static can harm sensitive chips. Keep the phone on the anti-static mat and wear the wrist strap for the entire repair, not just part of it.
7. Take photos during disassembly.
Modern phones have many cables and brackets. A photo of each step provides a visual reference for reassembly, reducing guesswork and errors.
8. Test before sealing completely.
Before applying the final adhesive and pressing the screen, reconnect the battery and test the screen, camera, buttons, and charging. If something does not work, the phone is still open and easy to fix. Only seal after full verification.

Starting with a solid set of cell Phone Repair Tools gives beginners a clear advantage. The basic tools open and close the device safely, the precision instruments handle delicate internal work and circuit diagnosis, and following the safety tips avoids common rookie mistakes. With practice and patience, anyone can master smartphone repairs. For more advanced jobs, add specialised diagnostic equipment like an oscilloscope later. The journey begins with the right gear and the right habits.


