For office workers, the laptop is our most important office tool. When your laptop's battery health drops below 60% to 70% of its original capacity, replacing the battery becomes the optimal choice for extending the device's service life and improving endurance. Replacing the battery yourself not only saves high repair costs but also allows you to gain a deep understanding of the computer's internal structure. For users with basic hands-on skills, this repair can be completed within two hours as long as you make full preparations.

I. Preparation and Tool List
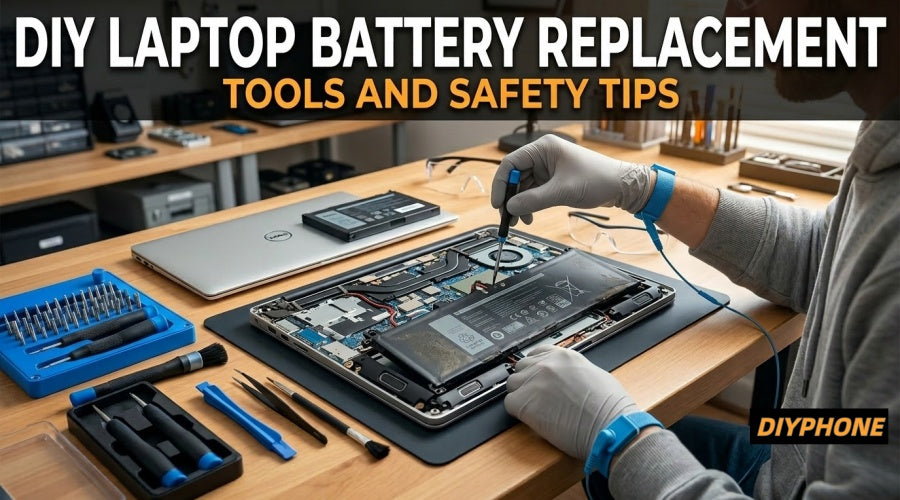
Before disassembling the device, choosing the right tools and establishing a standard operating environment is the foundation for a successful repair. Never start the process without any preparation.
1. Essential Tools
To ensure the operation process is both efficient and safe, it is recommended to prepare the following professional repair tools:
· Repair Toolkit: The Laptop Repair Toolkit must include PH0 and PH1 Phillips screwdrivers, which cover the vast majority of laptop back panels and battery mounting screws on the market.
· Spudger: This is an essential tool for prying open laptop casings and disconnecting ribbon cables. The plastic material prevents short circuits caused by metal conductivity while avoiding scratches to delicate electronic casings.
· Anti-static wrist strap: Before touching sensitive components such as the motherboard, wearing an anti-static wrist strap can discharge human static electricity, preventing static from damaging motherboard circuits.
· Screw organizer or magnetic pad: Internal laptop screws vary in length. Using a magnetic pad with labeling functions ensures that screws can be accurately returned to their original positions during reassembly, avoiding puncture damage caused by screws of different lengths.
· Precision tweezers: It is recommended to use tweezers with plastic tips for precisely gripping tiny interfaces or connectors, reducing mechanical damage.
2. Environment and Pre-operation
· Working environment: Choose an area with sufficient light and a hard, flat tabletop. Be sure to avoid carpets or fabric-covered workstations, as these environments are highly prone to generating static electricity.

· Release static electricity and residual power: Before disassembly, please shut down the computer completely and unplug the charger. Press and hold the power button for 15 seconds; this action effectively releases residual charge stored in the motherboard capacitors, ensuring electrical safety during the disassembly process.
· Reference service manual: Visit the brand's official website to view the official service manual for your specific model. The manual will detail the exact location of internal screws, cable routing, and BIOS setting suggestions before removing the battery.
3. The Importance of Documentation
After removing the back panel, it is recommended to use your phone to take pictures of the original screw positions and cable layout. This provides the most intuitive reference for the subsequent restoration stage and reduces the error rate.
II. How to Accurately Locate and Purchase a Compatible Battery
Purchasing a battery is the most critical step in the entire repair process. Purchasing based solely on the laptop model often leads to compatibility issues because the same model may exist in different production batches.
1. Confirm the Part Number
The Part Number printed on the battery label is the unique proof of compatibility. You can find it on the battery itself. In addition, you can check the battery information by entering the BIOS interface or by inputting the serial number on the manufacturer's official website for precise retrieval.
2. OEM Original and Third-Party Batteries
· OEM original batteries: Prices are usually higher, but the internal chips can achieve perfect matching with computer firmware, accurately reporting health status and charging data.
· Third-party batteries: For those with limited budgets or for refreshing older models, choosing a third-party supplier with a good reputation and warranty is an economical choice. When purchasing, you should focus on verifying whether the voltage (V), capacity (mAh), number of connector pins, and physical dimensions are almost identical to the original battery.

III. Battery Replacement Steps
When performing the disassembly, please strictly follow the following process to avoid rough handling.
Step 1. Completely shut down and disconnect power: Ensure the system is completely shut down rather than in sleep mode, unplug the power cord, release residual electrical energy, and press and hold the power button for 15 seconds.
Step 2. Remove the bottom case: Use the corresponding screwdriver to remove the back panel screws and place them in the Magnetic Storage Pad according to their positions. Use a plastic pry tool to gently pry open the bottom case along the edge gaps. If you encounter resistance, please double-check if there are any screws hidden under rubber pads.
Step 3. Disconnect and remove: Locate the ribbon cable connecting the battery to the motherboard. It is strictly forbidden to pull the wires directly; use a plastic pry tool to gently lift the connector vertically and pull it out steadily. Unscrew the mounting screws. If the battery is fixed with adhesive, you can use a heating pad or a warm cloth to cover the bottom; after the glue softens, slowly pry it away using a plastic card.
Step 4. Installation and restoration: Place the new battery into the slot and insert the connector until you hear a crisp click. Tighten the mounting screws in their original positions. Close the bottom case and tighten the screws. After completion, perform battery calibration: charge the battery to 100%, keep it in a charging state for one hour, then completely deplete the power, and recharge it again. This process helps the BIOS re-identify the actual capacity of the battery.

IV. Troubleshooting and Safety Warnings
If any abnormalities occur after replacement, please remain calm. They can usually be handled in the following ways:
· The system cannot detect the battery: Usually, the connector is not inserted tightly; please re-check the ribbon cable interface.
· Abnormal charging and discharging: Please perform a complete deep cycle calibration. If it still fluctuates, it may be a battery firmware compatibility issue.
· Important note: If you find that the battery is bulging, the casing is deformed, or the touchpad is lifted, please stop all operations immediately and do not disassemble it yourself. This is a serious lithium battery failure with a fire risk; please send it to a professional repair agency for handling.
In addition, waste lithium batteries are hazardous waste; please do not throw them into household trash cans. Please follow local regulations and deliver them to a designated electronic waste collection point for safe disposal. Through standardized operations, you will not only be able to give your laptop a new lease on life, but also deeply experience the sense of accomplishment brought by DIY repair.


