
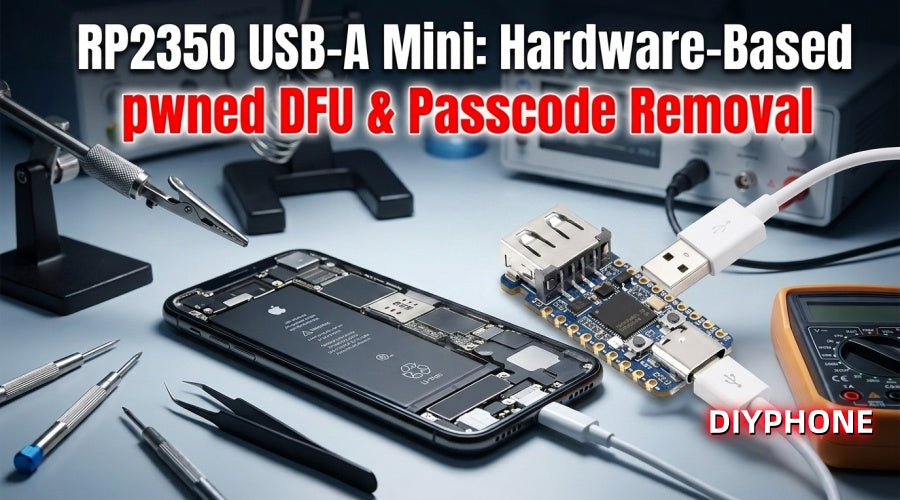
Low-level flashing and passcode lock removal technology for iOS devices (A12/A13 chips) based on the Raspberry Pi RP2350A chip integrates the latest hardware exploit schemes and open-source repair tools. DIYPHONE will analyze the relevant technical background, fault analysis, repair preparation, and a systematic breakdown of specific operating procedures for you.

I. RP2350 USB-A Mini Development Board
RP2350-USB-A is a miniature development board designed based on Raspberry Pi's second-generation microcontroller RP2350A Development Board. Due to its unique hardware architecture and flexible interface characteristics, it has become the core hardware carrier for current low-level iOS hardware repair and vulnerability exploitation.
1. Dual-Core Dual-Architecture and Performance Advantages
· Adopts a unique dual-core dual-architecture design, integrating both ARM Cortex-M33 and Hazard3 RISC-V processors, with a maximum clock frequency of up to 150 MHz.
· High processing performance and precise timing control capability enable it to perfectly handle complex and high-precision hardware-level signal handshakes.
2. Interface and Expansion Design
· Onboard 2MB Flash storage, offering 15 multifunctional GPIO pins with flexible pinouts.
· Features a castellated hole edge design, allowing it to be used as an independent module or easily surface-mounted and integrated into various repair expansion boards (such as B4 Pico, Magico DFU Mando, and other tools).
· Possesses a dual USB interface system: a native USB Type-C interface for power supply and firmware flashing; and a USB Type-A interface broken out via PIO (Programmable I/O) pins, supporting Host/Device modes to directly establish precise low-level data communication with Apple devices.
II. Apple A12/A13 Device Faults
In the field of iOS repair, devices utilizing Apple A12 and A13 chips often face faults such as screen passcode lockouts, disabled screens from multiple incorrect attempts, or stuck interface screens.
1. Fault Scenarios and Repair
· Users forgetting their screen lock passcodes result in the device being unable to enter the system; traditional flashing may trigger Activation Lock or result in data loss dilemmas.
· Traditional manual wire-jumping to enter low-level mode is extremely cumbersome and easily causes secondary damage to motherboard components.
2. pwned DFU Vulnerability and Hardware Trigger Mechanism
· Utilizing BootROM-level vulnerabilities such as USBLiteR8 targeting A12/A13 devices, the device can be booted into pwned DFU (low-level exploited DFU) mode.
· Utilizing the RP2350A chip's PIO to simulate precise sequential signals enables automated low-level handshaking and state switching without manual wire-jumping, achieving "one-click boot" into pwned DFU mode, which greatly lowers the hardware repair threshold and failure rate.

III. Repair Preparation Work and Tool List
Before carrying out passcode lock removal and low-level repair on A12/A13 devices, professional hardware testing equipment, specialized flashing tools, and supporting software environments must be prepared.
1. Repair and Auxiliary Testing Tools
·DC Power Supply: Used to monitor device power-on current to determine whether the motherboard has a short circuit or power supply abnormality.
· Digital Multimeter: Used to test resistance to ground at key motherboard nodes (such as USB data lines D+/D-, VBUS) to ensure normal interface circuits.
· Hot Air Gun: Used if ribbon cable soldering or surface-mount assembly is required on development boards or expansion interfaces.
· Anti-Static Tweezers and Flux/Rosin: Used to assist in handling tiny components and cleaning circuits.
· Data Cables: Including a Type-C Data Cable (for connecting the development board to a PC) and a Lightning-to-USB-A data cable/adapter (for connecting the RP2350 tool to target iPhone/iPad devices).
2. Hardware Trigger Tools
· RP2350A Pwned DFU Hardware Adapter: An RP2350-USB-A Mini development board flashed with proprietary boot firmware, or repair ribbon cables built around it as the core (such as B4 Pico / Magico DFU Mando).
3. Software Tools and Other Preparations
· bobik_eraser Software: A free A12/A13 screen lock removal tool developed by developers bablaerrr and @Vladdffff (latest version v1.0.0).
· Flashing Auxiliary Software: Such as 3uTools or iTunes, used for driver recognition and system recovery booting.
· Operating System Environment: Recommended to run in a clean Windows 10/11 environment with Apple device USB drivers and LibUSB drivers installed in advance.

IV. Specific Repair Steps
This process is applicable to A12/A13 devices that have ruled out physical hardware damage and only require clearing the screen passcode lock and restoring to the Hello activation screen.
Step1. Hardware Connection and Booting into pwned DFU Mode
· Connect the RP2350-USB-A development board (flashed with DFU boot firmware) to the computer via the Type-C interface, and confirm that the device is correctly recognized in the computer's Device Manager. Manually boot the target iPhone or iPad into standard DFU mode (button combination: after connecting to the computer, press Volume Up, Volume Down, then press and hold the Power button until the screen turns black; then press and hold both the Power button and Volume Down button for 5 seconds, release the Power button while continuing to hold the Volume Down button until the computer detects the DFU device).
· Connect the target device to the USB-A interface of the RP2350 development board. The RP2350A will utilize PIO to automatically send the hardware-level exploit payload (USBLiteR8) and complete automatic signal handshaking. Observe the status indicator LED on the RP2350 development board or driver prompts on the PC to confirm that the device has successfully transitioned from standard DFU mode to pwned DFU mode.
Step2. Executing the Passcode Lock Erasure Program
· Extract and run the bobik_eraser tool as administrator on the computer. The program will automatically detect the A12/A13 device in pwned DFU mode and display the device chip model and connection status on the interface.
· Click the "Erase Passcode" or "Clear Passcode" command on the tool interface. The software will inject a specific flashing script into the device to erase the passcode status information in the system partition. Wait for the progress bar to complete; after the software indicates successful erasure, the device will automatically reset and reboot.
Step3. System Booting and Activation Testing
· After rebooting, the device will automatically enter the system initialization phase and eventually stop at the initial Hello Setup (activation) screen. Use 3uTools or iTunes to check the overall health status and firmware version of the device, and re-flash the latest official iOS firmware according to requirements.
· Proceed with normal setup flow to confirm that the screen lock is completely cleared and all basic features of the device (Wi-Fi, Bluetooth, touch, camera, etc.) have returned to normal.
V. Repair Precautions
1. Data Backup Risk Warning
· The process of erasing the passcode lock will permanently erase all user data stored locally on the device. Data risks must be explained to the customer before proceeding.
2. Hardware Operation Standards
· When using the RP2350A for low-level signal injection, ensure a stable power supply voltage (standard 5V USB power) to avoid hardware handshaking failures or chip damage caused by voltage fluctuations.
· Use professional Mobile Repair Tools and maintain anti-static measures during operation to prevent human body static electricity from breaking down the exposed GPIO pins of the RP2350 development board or the interface circuits of the target device.


