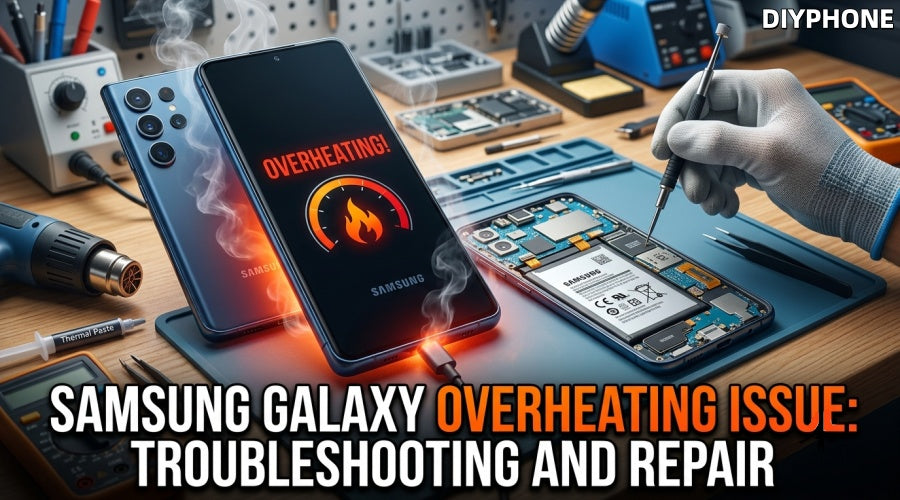
It is normal for Samsung Galaxy series phones to generate slight heat during long periods of operation or fast charging. However, if the phone continues to heat up while on standby or during light use, it usually indicates a system or hardware abnormality. Prolonged abnormal heating will directly accelerate battery aging and can even damage motherboard chips. Don't worry, DIYPHONE will systematically analyze the root causes of Galaxy phone heating and provide you with a detailed troubleshooting and repair solution.

I. Core Causes of Galaxy Phone Heating
Heating in Galaxy phones is typically the result of a combination of software loads, hardware wear, and environmental factors.
1. Abnormal Load at the Software Level
· Background App Issues: Some third-party applications continuously refresh in the background or experience code deadlocks, causing the processor (CPU/GPU) to constantly run at high frequencies.
· System Optimization After Updates: Within 48 hours of completing a major One UI version update, the system performs ART (Android Runtime) compilation optimization in the background. This causes a short-term increase in standby heat, which is normal.
· System Firmware Bugs: Outdated system versions that have not been updated in a timely manner may contain power consumption control bugs, failing to allocate processor resources efficiently.
2. Hardware Wear and Circuit Faults
· Natural Battery Aging: As the number of charge-discharge cycles increases, the internal resistance of the battery increases and the efficiency of the chemical reaction decreases, causing a large amount of electrical energy to be converted into heat energy.
· Charging Circuit and IC Faults: If a slight short circuit or component breakdown occurs in the phone's internal Power Management Integrated Circuit (PMIC) or charging control circuit, it will cause severe heating under low loads or even during standby.
· Increased Contact Resistance at the Interface: Accumulation of dust, oxides, or moisture inside the charging port will increase contact resistance during charging, generating localized high heat at the port.
3. Environmental and Physical Behavioral Factors
· Obstructed Heat Dissipation: Direct sunlight, high-temperature environments on car dashboards, and thick plastic or rubber protective cases will seriously hinder the natural heat conduction and radiation dissipation of the phone body.
· Poor Signal Quality: When the phone is in a basement or at the edge of base station coverage, the Radio Frequency Power Amplifier (PA) will significantly increase its transmission power to maintain communication, causing the phone to heat up noticeably even when not in use.
· Using While Charging: The chemical heat generation from battery charging overlaps with the electrical heat generation from processor operation, causing heat to accumulate rapidly.

II. Determination and Troubleshooting of Abnormal Heating
Before disassembling the phone or blindly replacing parts, the nature of the heating must be accurately determined.
1. Typical Signs of Abnormal Heating
· Severe Performance Throttling: To cool down, the system forcibly limits the processor frequency, resulting in lag when sliding the interface and the screen brightness automatically dimming for no reason.
· High-Temperature Warning Pop-ups: An official One UI warning prompt pops up on the screen, restricting the use of camera functions or directly stopping charging.
· Automatic Shutdown Without Warning: The hardware protection mechanism is triggered, and the phone directly cuts off the power.
· Abnormal Power Consumption: In "Settings" -> "Battery and device care", if a single application is found to consume more than 30% of the power, that application is usually the cause of the heating.
2. Fault Nature Differentiation
Determination Method: Clear all background programs, turn on Airplane Mode, and place the phone in a cool place. If the phone body continues to heat up within half an hour under conditions of no network and no running programs, or becomes instantly scalding only when connected to the charger, software problems can basically be ruled out, locking the cause down to battery aging, motherboard leakage, or charging circuit hardware failure.
III. Daily Independent Repair
For the vast majority of non-hardware faults, the issue can be resolved by adjusting system settings and changing usage habits.
1. Optimize System Resources and App Management
Use the built-in "Device Care" tool on Galaxy to perform a one-click optimization, forcibly closing background processes with abnormally high energy consumption. Uninstall stubborn software that is not used for a long time and tends to permanently reside in the background to reduce CPU wake-ups. In daily high-load scenarios, turn on "Power Saving Mode", which limits maximum CPU performance and reduces unnecessary background activity.

2. Improve the Physical Environment for Heat Dissipation
When the phone heats up, immediately remove thick protective cases and place the device on a cool, flat, hard surface (such as a desktop). Do not place it on fabrics that easily accumulate heat, such as sofas or mattresses. Avoid using the phone in high-temperature environments like direct intense sunlight or enclosed car compartments. In weak signal areas, Airplane Mode can be temporarily turned on to block the continuous high-power output of the RF amplifier.
3. Regulate Charging Habits and Firmware Upgrades
Always use certified, regular charging equipment to avoid unstable voltage output from low-quality third-party charging heads. Try to avoid playing large games or recording 4K video while charging. Regularly go to "Settings" -> "Software update" to keep the One UI system at the latest version in order to obtain official power consumption optimization patches.
IV. Repair Methods for Hardware-Induced Heating
When it is confirmed that the heating is caused by a hardware fault, such as the battery life reaching its end, battery swelling causing the back cover to bulge, or a local short circuit on the motherboard, disassembly and repair using professional tools are required. The following takes common Galaxy S series models as an example for analysis.
1. Preparation and Tool Inventory Before Repair
Before starting work, make sure the workbench is clean and anti-static, and prepare the following professional phone repair tools:
Digital Multimeter: Used to detect the resistance value between the positive pole of the motherboard power supply and the ground.
Hot Air Gun: Used to soften the waterproof adhesive of the back cover.
Opening Tools: Like Picks or Suction Cup, used to safely separate the back cover.
Anti-static Tweezers and Plastic Pry Bar: Used to disconnect flex cables to avoid causing secondary short circuits.
Precision Screwdriver Set: To remove the internal middle frame fixing screws.
DC Power Supply: Used for power-on testing to check if the motherboard has standby current leakage.
Anhydrous Alcohol and Anti-static Brush: Used to clean interfaces and the motherboard.

2. Core Repair Steps
Step1. Safe Disassembly and Power Disconnection
Turn off the phone, use a Screen Heating Separator to evenly heat the edges of the back cover to approximately 80°C, use a suction cup and an ultra-thin opening pick to carefully slice open the waterproof adhesive, and remove the back cover. Use a screwdriver to unscrew the fixing screws of the wireless charging coil and the middle frame, then remove them.
Critical Operation: Disconnect the battery flex cable at the very first moment using a plastic pry bar. Before the battery power supply is disconnected, it is strictly forbidden to use any metal tools to touch motherboard components.
Step2. Battery Detection and Replacement
If the battery appearance is found to be swollen or bulging, or if the battery health is detected to be extremely low through the system, the battery must be replaced. Drip a small amount of anhydrous alcohol into the gaps around the edges of the battery to weaken the battery adhesive, and use a plastic pry tool to slowly pry up the old battery (never puncture the battery with metal tools, otherwise there is a risk of fire). Clean the residual glue in the battery compartment, apply special thermal adhesive tape, and install a brand new original or high-quality replacement battery.
Step3. Port Dock Module and Charging Circuit Troubleshooting
If the heating is concentrated at the bottom of the phone, use an anti-static brush dipped in a small amount of anhydrous alcohol to carefully clean the oxide layer and foreign objects inside the USB-C port. If it still heats up severely during charging after cleaning, the port dock flex cable needs to be disconnected, and a multimeter used to measure whether the protection diode and capacitor on the small port dock board have a breakdown short circuit. If so, directly replace the port dock board assembly.
Step4. Motherboard Leakage and Chip-Level Heating Repair
If the heat source is located in the upper-middle part of the motherboard (CPU or Power IC area) and is accompanied by rapid standby power consumption, the motherboard needs to be removed. Adjust the DC regulated power supply to the nominal voltage of the phone (approx. 4.2V) and connect it to the motherboard battery interface.
Observe the ammeter of the regulated power supply without pressing the power button. If the ammeter shows a standby current of tens of milliamperes (mA) or even hundreds of milliamperes, it indicates that a power supply component on the motherboard is leaking current. In conjunction with the rosin atomization method or an infrared thermal imager, observe which capacitor or inductor on the motherboard heats up first. After locating the faulty component, use a heat gun and a soldering iron to replace it.
Step5. Reassembly and Testing
After the repair is completed, reconnect the battery flex cable, install the middle frame back, and tighten the screws. Turn on the phone to perform charging tests, benchmarking tests, and standby tests to confirm that the body temperature has returned to the normal range. Clean the residual glue on the edges of the back shell, re-apply special waterproof sealing tape, and press-fit the back cover.
V. Summary and Preventive Recommendations
Samsung Galaxy phone heating needs to be distinguished between software load and hardware damage, and handled accordingly using correct methods or professional Phone Repair Tool Kits. In daily use, adhering to using official original chargers, avoiding playing while charging, regularly cleaning foreign objects from the charging port, and keeping the system updated are the keys to preventing thermal damage and prolonging the lifespan of the entire device.


