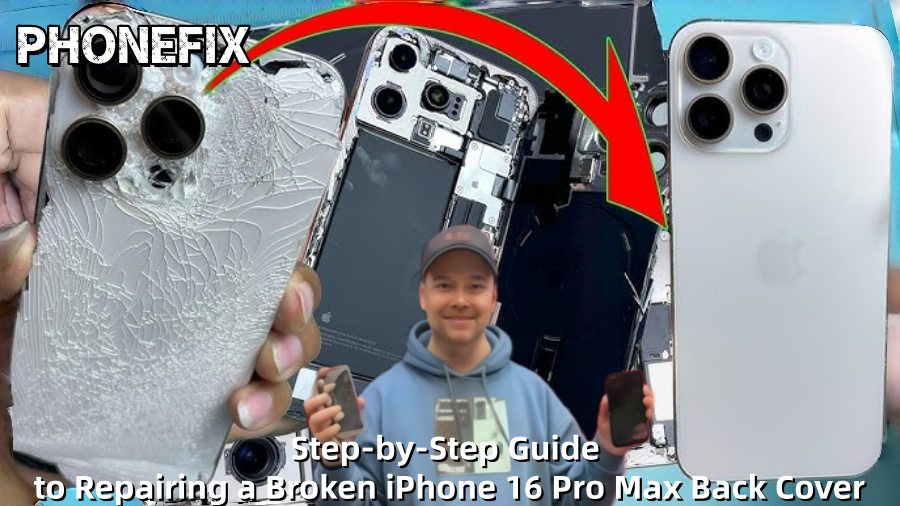
Although the iPhone 16 Pro Max is a sophisticated smart device with strong hardware and a lovely design, if it is dropped unintentionally, its back glass may shatter or break. Many customers find it annoying when their phone has a cracked back, particularly if it is still working. Fortunately, it is not impossible to fix a shattered rear cover, although it does take some expertise. You can mend your iPhone 16 Pro Max back cover step-by-step with the help of this comprehensive repair instructions from Phonefix.

I. Preparation and Safety
Before attempting to repair your iPhone back cover glass, ensure you have the necessary tools and materials ready and understand the operating procedures. Repairing a broken back cover requires relatively complex skills, involving the disassembly and reassembly of multiple components, so please ensure you have some hands-on ability and a good understanding of electronic devices.
Required Tools:
· Hot air gun or hair dryer;
· Suction cup;
· Pentalobe screwdriver;
· Plastic pry bar or card;
· Tweezers;
· Isopropyl alcohol (99% purity);
· Lint-free cloth;
· New iPhone back glass
· New adhesive (original adhesive recommended)
· Safety goggles
Preparation:
1. Turn off the phone: To avoid any electrical problems, always turn off the phone before starting the repair.
2. Deplete the battery: Reduce the battery level to below 25%. This reduces the risk of puncturing the battery during disassembly.
3. Choose a workspace: Ensure your work area is clean, well-lit, and free of clutter to prevent parts from being lost or contaminated.
Waterproofing Note: Opening the phone will damage its original waterproof seal. Therefore, during reassembly, the seal will need to be re-bonded to restore its original waterproof function.
II. Repair Steps
Step 1: Remove the Bottom Screws
First, we need to remove the two pentalobe screws at the bottom. This step is done using a pentalobe screwdriver. Carefully remove the screws and place them in a safe location to prevent loss.
Step 2: Heat the Back Glass
Gently heat the back glass of the phone using a hot air gun or hairdryer. The purpose of heating is to soften the adhesive holding the glass in place, making it easier to remove the back panel. When using a hot air gun, ensure the temperature is moderate to avoid overheating and damaging internal components.

Step 3: Create a Gap and Begin Prying
Use a suction cup to gently lift the back glass, creating a small gap. Insert a plastic pry bar or card into the gap and carefully pry the glass along the edge. Repeat this process while heating to ensure the glass gradually loosens. Note that the prying depth should be shallow, not exceeding 3 mm, to avoid damaging the wireless charging coil and other flexible cables.
Step 4: Carefully Pry Open the Back Cover
While prying the back panel, carefully lift the glass starting from the camera side, gently opening it like turning the pages of a book. Extreme care is needed at this stage to avoid tearing the internal flexible cables or wireless charging coil. If you encounter difficulties, you can gently heat the material to soften the adhesive and help pry it open.
Step 5: Disconnect and Remove Internal Components
Once you have successfully opened the back cover, the next step is to remove the internal components:
1. Remove the metal shield: First, remove the metal shield covering the iPhone components to disconnect the battery, cables, and other connectors.
2. Disconnect the battery power: Carefully disconnect the battery connector using tweezers, avoiding accidentally triggering a short circuit.
3. Carefully remove the wireless charging coil: Carefully remove the wireless charging coil, flash assembly, and microphone from the old back cover using tweezers and plastic tools.
Step 6: Clean the Frame
Before installing the new glass, the frame needs to be thoroughly cleaned. Wipe the frame with 99% isopropyl alcohol and a lint-free cloth to remove all residual old adhesive, glass fragments, and dust. Ensuring the frame is clean and tidy will ensure a more secure installation of the new back cover.
Step 7: Install the New Back Cover
After cleaning, you can begin installing the new back cover:
1. Apply Adhesive: Apply new adhesive evenly around the frame, paying particular attention to the MagSafe ring and wireless charging coil.
2. Align the New Back Cover: Carefully align the new back cover glass with the frame, ensuring all components are correctly positioned, especially the wireless charging coil and MagSafe ring.
3. Reinstall Components: Reinstall the wireless charging coil, flash, and microphone components into the new back cover and connect them to the flexible cable.

Step 8: Reassemble the iPhone
1. Reconnect the Battery: Reconnect the battery connector to its original position, ensuring all connectors are secure.
2. Install the Metal Shield: Replace the metal shield in its original position, ensuring all components are properly protected.
3. Install the Bottom Screws: Use a pentalobe screwdriver to reinstall the two bottom screws, ensuring they are tightened securely.
Step 9: Testing Functionality
After completing all steps, power on the phone and test its functionality:
1. Check Wireless Charging: Confirm that MagSafe and wireless charging are working properly.
2. Check Flash and Microphone: Test that the flash and microphone are working properly.
3. Reboot Cycle Test: Ensure the phone does not experience a reboot cycle.
III. Important Notes
1. Wireless Charging Coil: This is a critical component in the repair process. A damaged iPhone wireless charging coil may cause charging failures and reboot cycles. When installing the new back cover, ensure the wireless charging coil is in the correct position.
2. Repair Assistant: As required by Apple, the repair process may require the use of their official software (such as "Repair Assistant") to ensure the newly replaced parts function properly.
It takes some technical expertise and time to fix an iPhone 16 Pro Max's damaged rear cover. Make sure the workspace is tidy and that the necessary equipment are on hand before starting a DIY repair. If you decide to use professional repair services, China Phonefix provides top-notch repair kits and expert tools to ensure a smooth repair. We can offer complete assistance to guarantee a more seamless repair procedure, whether it involves utilizing tools or buying replacement parts.
To help you better understand the entire repair process, we have prepared a detailed video tutorial below, guiding you step by step through the repair of the iPhone 16 Pro Max back cover.


