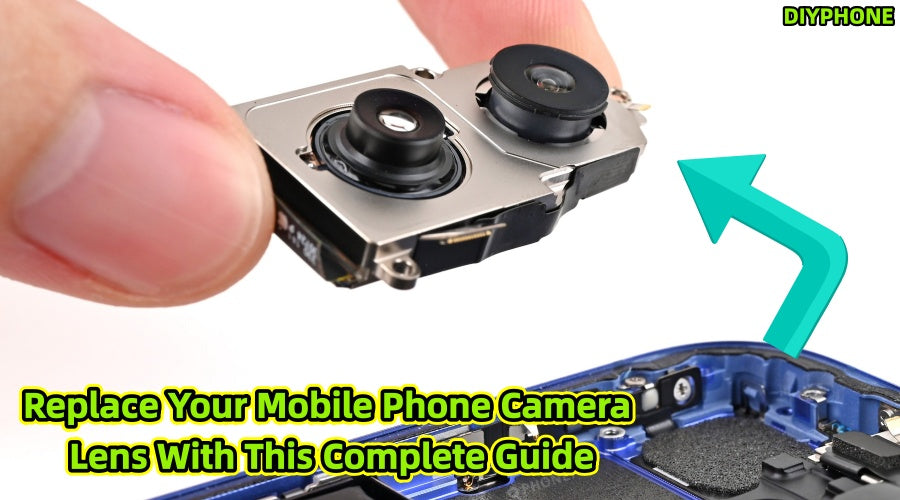
A broken mobile camera lens not only impacts the device's appearance but can also lead to severe hardware damage by exposing internal components. Proper diagnosis, matching the specific model parts, and refined construction techniques are key to ensuring a successful repair. DIYPHONE will provide you with a systematic repair plan to help you accurately identify issues, prepare the necessary tools, and safely restore camera performance.

I. Fault Diagnosis
Before purchasing parts, accurately assessing the level of damage is the core of saving on repair costs.
1. Identify the Damaged Area
· Lens glass damage: This is the most common physical damage, characterized by externally visible cracks, scratches, or chips. This only affects the optical outer layer; photos usually remain clear, though abnormal light spots or hazy blurs may appear in backlit conditions.
· Internal camera module damage: This is a deeper hardware failure, characterized by permanent dark spots on images, persistent inability to focus, mechanical vibrating sounds during shooting, or the camera failing to start. These are classic signals of damage to the autofocus motor, image stabilization components, or the sensor itself.
2. In-depth Diagnostic Test Methods
· Multi-focal and multi-lighting tests: In a well-lit environment, test the main, wide-angle, and telephoto lenses separately. Move the phone against a white wall or solid-colored background to observe if the flaws move with the background. If fixed dark spots appear on photos and do not disappear regardless of lens cleaning, it can be concluded that the sensor surface is dusty or damaged.
· Mechanical failure inspection: Open the camera and gently shake the phone. If you hear a faint "clinking" sound similar to loose internal parts, or if there is noticeable friction during focusing, it indicates the focus motor inside the module has sustained physical damage. In this case, replacing only the external glass will not solve the problem. Please stop DIY attempts and hand it over to a professional repair institution for a full module replacement.
3. Model Characteristics and Pitfall Guide
Different brands have technical differences in lens repair; understanding these characteristics is crucial:
· iPhone series: Pay special attention to prevent isopropyl alcohol liquid from flowing into the module. iPhone Rear Camera are very hard; the glass powder produced after breaking is highly abrasive, so suction equipment must be used during cleaning.
· Samsung/Other Android flagships: These phones often adopt a multi-lens collaborative structure (such as periscope telephoto) with very small gaps between lenses. When prying a single lens, it is easy to cause vibration impact to other surrounding lenses. It is recommended to use special soft silicone pads to protect other lenses during repair to prevent accidental damage.

II. Tool Preparation and Environmental Requirements
1. Essential Repair Tool List
· Precision tweezers and plastic spudgers: Pointed tweezers are used to clean up remaining debris, while plastic spudgers are used to pry up the lens, preventing metal tools from scratching the frame coating.
· Dust-free workstation setup: It is recommended to use a humidifier around the operation area to increase air humidity and reduce floating dust. Wear an anti-static wrist strap before operation to prevent static electricity from breaking through the fragile CMOS sensor.
· Cleaning supplies: Prepare 99% purity isopropyl alcohol and high-density lint-free cotton swabs to ensure the mounting surface is free of old grease.
· Temperature-controlled hot air gun: This is the key to disassembly. It is recommended to set it around 80°C. Do not use high heat directly on the camera area to avoid breaking the seal or damaging the sensor due to overheating.
· Specialized sealing adhesive: Select industrial sealing adhesive or specialized lens installation glue with moderate viscosity.
2. Safety Operation Guidelines
· Protective tools: Broken glass can be extremely thin and sharp; be sure to wear safety goggles to prevent fragments from flying into your eyes.
· Pitfall points: It is strictly forbidden to use metal probes to clean the inside of the module, as the internal coating is extremely thin and irreparable. Any operation must strictly adhere to the "only handle the glass edges" principle.

III. Lens Replacement Steps
Step 1. Safe heating and removal
Use the Hot Air Gun to move evenly around the lens edge, heating for 30 to 60 seconds to soften the original adhesive. When the glass feels slightly warm but not hot to the touch, use a suction cup or plastic spudger to slowly lift it from one side. If resistance is encountered, heat it again; do not pry with force to avoid shattering the glass into smaller particles that could fall inside.
Step 2. Deep cleaning of the base
After removing the lens, the metal slot must be thoroughly cleaned. Use a cotton swab dipped in isopropyl alcohol to wipe repeatedly until no residual black adhesive or glass powder is visible. Any tiny residue will cause the new lens to be installed unevenly, subsequently leading to dust ingress or water vapor condensation.
Step 3. Precision installation technique
· Orientation alignment: Modern mobile camera modules usually have subtle orientation sensors or shaped notches. Before installation, be sure to compare the edge details of the original lens to ensure the orientation is consistent.
· Glue control: Many DIY repair failures are caused by glue overflow. You should apply a very thin layer of glue to the inner edge of the lens; it is strictly forbidden to apply it to the central sensor aperture of the module. Use a dispensing needle to ensure the glue line is continuous and free of breaks.
Step 4. Pressure reinforcement and curing
Align the slot and press in gently, pressing from the center outwards to discharge excess air. After installation is complete, use a heavy object or cloth pad to press the lens for at least 60 seconds, then let it sit for at least 4 to 24 hours until the glue is completely cured to ensure optimal sealing performance.

IV. Performance Verification and Aftercare
1. Multi-dimensional Test Plan
· Clarity check: Once completed, open the camera and aim at printed text at a distance of 30 cm. Check the focus speed and image sharpness. If the edges are blurry, it is usually because the glue is too thick, preventing the lens from fully settling into the base.
· Light interference test: Shoot in a backlit environment to observe if there is any abnormal hazy glare. This is usually caused by dust inside the lens or poor quality of the coating.
2. About waterproofing
Waterproof performance failure warning: Even if professional sealing glue is used, DIY repair cannot replicate the precision gluing process of the factory vacuum environment. Repaired phones should be strictly prohibited from being submerged in water. Keep the phone in a dry environment for 48 hours after repair to avoid contact with humid air.
3. Long-term maintenance advice
It is recommended to install a tempered glass lens protector immediately after repair, which can serve as a second line of defense to protect the newly replaced lens. For daily cleaning, use only high-grade microfiber cloths; avoid paper towels or rough fabrics, as such materials will leave tiny scratches on the lens surface over long-term wiping, which will seriously affect macro shooting results.
Conclusion
DIY replacement of mobile lenses can solve expensive factory repair quotes at a very low cost. Please note that the value of professional mobile repair personnel lies not only in replacing parts, but also in their possession of professional Mobile Repair Tools and a clean, dust-free repair environment. For most physical glass breakage, as long as you strictly follow the above procedures, maintain a high level of cleaning awareness, and calibrate patiently, you can complete the repair successfully and restore the best performance of your mobile photography functions.


